Installing pavers can completely transform your outdoor space into something beautiful and functional. I remember the excitement of planning my first paver project, but I also knew that having the right tools was essential for success.
From basic hand tools to specialized equipment, the right set can make the job easier and more enjoyable. Whether you’re a DIY enthusiast or tackling your first project, knowing which tools to use will help you achieve professional-looking results.
Let’s explore the must-have tools that will set you up for a smooth and efficient paver installation experience.
Essential Tools for Installing Pavers
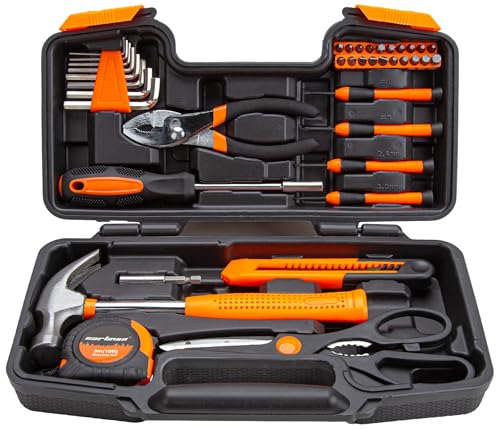
Installing pavers requires specific tools to ensure precision and quality. I use the following essential tools for every project:
- Measuring Tape
Ensures accurate measurements for layout and spacing, preventing costly mistakes.
- Level
Guarantees a flat surface by checking the evenness of the paver installation.
- Rubber Mallet
Allows me to gently tap pavers into place without damaging them.
- Shovel
Facilitates the excavation and preparation of the base layer efficiently.
- Wheelbarrow
Enables easy transportation of materials like sand and gravel across the site.


- Plate Compactor
Compact the base material thoroughly, providing a stable foundation for the pavers.
- Broom
Cleans the surface post-installation, removing excess sand and debris.
- Paver Saw
Cuts pavers precisely to fit edges and corners, ensuring a seamless finish.
Having these tools on hand makes the installation process smoother and helps achieve professional-looking results.
Manual Tools
Having the right manual tools simplifies paver installation and ensures precise results. These tools allow for control and accuracy during each step of the process.


Shovels and Spades
Shovels and spades are essential for excavation and base preparation. I use a round-point shovel for digging trenches and a flat spade for leveling the soil. These tools help create a stable foundation by removing excess material and ensuring an even surface.
Hand Tamper
A hand tamper compacts the base material effectively. I rely on a metal tamper for small areas and a rubber tamper for delicate adjustments. Using a hand tamper ensures the base is firm, preventing future shifting of the pavers.
Power Tools
I rely on power tools to enhance precision and efficiency during paver installation, ensuring a smooth workflow.
Plate Compactors
Plate compactors stabilize the base by compressing soil and gravel. Available in electric and gas-powered models, they offer varying power levels. For example:
| Model Type | Suitable Area Size |
|---|---|
| 2-ton | Small projects |
| 4-ton | Large installations |
Using a plate compactor minimizes settling, preventing pavers from shifting. Safety gear like gloves and goggles protects during operation.
« Mastering Budgeting for Tree Planting and Care: Essential Tips for Green Success Effective Landscaping for Hot and Dry Summers: Top Tips for Drought-Resistant Gardens »
Wet Saw
A wet saw provides precise cuts for pavers, essential for intricate patterns and edges. It features a water cooling system that prevents blade overheating and reduces dust. Common specifications include:
| Feature | Description |
|---|---|
| Blade Size | Typically 14 inches |
| Adjustable Depth | Accommodates various paver thicknesses |
Regular maintenance, such as cleaning the water reservoir and replacing blades when needed, ensures optimal performance. Investing in a quality wet saw results in professional-looking installations.
Specialized Installation Tools
Using specialized tools ensures precision and efficiency during paver installation. These tools enhance the quality of the finished project.
Laser Levels
Laser levels provide accurate measurements for a perfectly flat surface. I rely on rotary laser levels for large areas, ensuring consistent leveling across extensive spaces. Line laser levels are ideal for aligning individual pavers and creating straight edges. By maintaining precise elevations, laser levels prevent uneven surfaces and reduce the need for adjustments.
Paver Splitter
A paver splitter offers a clean, precise cut without creating debris. I prefer electric paver splitters for their speed and ease of use in cutting multiple pavers. Manual splitters are suitable for smaller projects, allowing for controlled cuts with minimal effort. Using a paver splitter enhances the overall appearance by ensuring uniform shapes and sizes, which contribute to a professional-looking installation.
Top Brands Reviewed
Brand A Overview
Bosch provides a wide range of tools essential for paver installation, including wet saws, plate compactors, and laser levels. Their wet saws feature water-cooled blades that ensure precise cuts and reduce dust. Bosch plate compactors offer consistent performance for stabilizing bases, enhancing the longevity of paver installations. Renowned for durability and reliability, Bosch tools cater to both DIY enthusiasts and professional contractors.
Brand B Overview
DeWalt specializes in robust tools designed for efficient paver installation, such as power saws, compactors, and laser alignment systems. Their wet saws deliver accurate cuts with minimal maintenance, while DeWalt plate compactors provide powerful compression for a stable foundation. DeWalt laser levels ensure precise alignment of pavers, contributing to a professional finish. Trusted for their high performance and user-friendly designs, DeWalt tools are a top choice for achieving quality results.
Budget vs. Premium Options
When choosing tools for installing pavers, I consider both budget and premium options to balance cost and performance.
Cost Comparison
| Tool Type | Budget Option ($) | Premium Option ($) |
|---|---|---|
| Wet Saw | 200 | 600 |
| Plate Compactor | 300 | 800 |
| Laser Level | 150 | 400 |
Features and Performance
Budget Tools
- Affordability: Ideal for small projects or occasional use.
- Basic Functionality: Provides essential features needed for paver installation.
- Limited Durability: Suitable for light to medium workloads.
Premium Tools
- Enhanced Durability: Built to withstand heavy use and harsh conditions.
- Advanced Features: Includes precision controls and additional functionalities.
- Efficiency: Reduces project time with higher performance capabilities.
Maintenance and Longevity
Budget Tools
- Lower Maintenance Costs: Simpler designs make maintenance straightforward.
- Shorter Lifespan: May require replacement sooner with frequent use.
Premium Tools
- Higher Maintenance Requirements: Advanced features may need regular servicing.
- Longer Lifespan: Designed for extended use, providing better long-term value.
Suitability
Budget Options
- DIY Enthusiasts: Perfect for homeowners tackling paver projects occasionally.
- Small-Scale Projects: Adequate for patios, walkways, and minor landscaping tasks.
Premium Options
- Professional Contractors: Essential for businesses handling multiple or large-scale installations.
- High-Volume Projects: Efficient for extensive paving jobs requiring reliable and robust tools.
By evaluating budget and premium tool options, I can select the best tools that meet my project’s specific needs and budget constraints.
Conclusion
Getting started with paver installation was easier than I thought once I had the right tools. Having everything I needed on hand made the whole process smoother and more enjoyable. It’s satisfying to see your outdoor space transform with each carefully placed paver.
I encourage you to invest in quality tools that fit your project needs. Whether you’re tackling a small walkway or a larger patio, the right equipment can make all the difference. Happy paving and enjoy your beautiful new outdoor area!


