Creating the perfect outdoor space starts with a beautiful paver patio. I’ve always found that paver patios not only enhance the aesthetics of a home but also provide a durable and versatile area for relaxation and entertainment.

In this guide, I’ll walk you through the design and installation process, sharing tips and tricks I’ve learned along the way. Whether you’re a DIY enthusiast or planning to hire professionals, you’ll find valuable insights to help you create a stunning patio that suits your style and needs.
Choosing the Right Pavers
Selecting the right pavers ensures your patio meets both functional and aesthetic needs. I consider several factors when making the best choice for your outdoor space.
Material Options
I evaluate various materials based on durability, maintenance, and appearance:
- Concrete Pavers: Affordable, versatile, available in multiple shapes and colors.
- Brick Pavers: Classic look, high strength, may require more maintenance.
- Natural Stone Pavers: Unique textures, long-lasting, higher cost.
- Porcelain Pavers: Resistant to stains and scratches, uniform appearance, modern style.
Style and Color
- Style Options:
- Herringbone: Interlocking pattern, offers stability and visual interest.
- Stacked: Random arrangement, creates a casual look.
- Grid: Uniform layout, simple and clean aesthetic.
- Color Selection:
- Neutral Tones: Blend seamlessly with various designs.
- Bold Colors: Make a statement, highlight specific areas.
- Earthy Shades: Integrate naturally with garden elements.
Design Considerations
Designing your paver patio involves careful planning to ensure it meets both your aesthetic and functional needs. Here are key factors to consider:
Layout Ideas
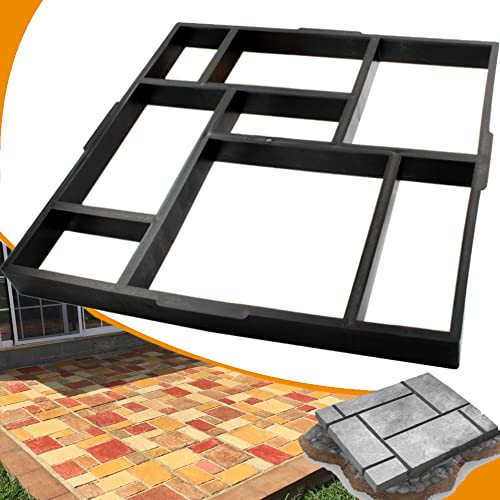
Exploring various layout options helps create a visually appealing patio tailored to your space. Popular patterns include:
- Herringbone: Features a V-shaped pattern providing a classic, dynamic look ideal for high-traffic areas.
- Stacked: Offers a casual, modern appearance with pavers laid directly on top of each other without a specific pattern.
- Grid: Arranges pavers in straight lines, creating a clean and organized feel suitable for contemporary settings.
- Circular: Utilizes curves and arcs to add softness and elegance, perfect for garden-like environments.
- Random: Mixes different shapes and sizes for a natural, eclectic vibe that complements various landscape styles.
Selecting the right layout depends on your patio’s size, intended use, and personal preference. Consider how each pattern influences the overall look and functionality of your outdoor space.
Measuring and Planning
Accurate measurement and detailed planning are crucial for a successful paver patio installation. Follow these steps:
- Calculate Area: Measure the length and width of the intended patio space. Multiply these dimensions to determine the total square footage.
- Select Paver Size: Choose pavers based on the calculated area. Common sizes range from 4×4 inches to 24×24 inches, depending on the desired look and functionality.
- Estimate Quantity: Account for a 10% excess to cover cuts and breakages. For example, a 200-square-foot patio requires approximately 220 pavers.
- Choose Base Material: Decide on a suitable base, typically crushed stone or gravel, to ensure proper drainage and stability.
- Plan Edges and Borders: Define the patio’s perimeter with edging materials such as plastic, metal, or concrete to maintain the layout and prevent shifting.
- Create a Layout Plan: Draw a detailed diagram of the patio, including measurements, paver patterns, and placement of any additional features like seating walls or fire pits.
Thorough measurement and meticulous planning lay the foundation for a durable and attractive paver patio, minimizing errors and ensuring a smooth installation process.


Installation Process
Installing a paver patio involves several essential steps to ensure it stands the test of time and looks great.
Site Preparation
Mark the patio area with stakes and string to define the shape. Excavate the site to a depth of 6-8 inches, removing grass, roots, and debris. Ensure the ground slopes away from your house at 1 inch per foot to prevent water pooling. Compact the soil using a plate compactor to create a stable foundation.
Laying the Base
Spread a 4-inch layer of crushed stone or gravel evenly within the excavated area. Use a rake to level the base, then compact it thoroughly with the plate compactor. Add a 1-inch layer of sand on top, leveling it with a screed board to provide a smooth surface for the pavers.
Installing Pavers
Begin laying pavers from one corner, following your chosen pattern. Place each paver tightly against the next to minimize gaps. Use a rubber mallet to tap pavers into position, ensuring they are level. After laying all pavers, sweep sand over the surface to fill the joints. Finally, run the plate compactor over the patio again to set the pavers firmly in place.
Maintenance and Care
Keeping your paver patio in top shape extends its lifespan and maintains its appeal. Regular maintenance ensures your outdoor space remains inviting and durable.


Cleaning Tips
I cleanse my patio regularly to prevent dirt buildup and stains. Sweeping weekly removes leaves and debris efficiently. For deeper cleaning, I use a garden hose with a high-pressure nozzle to wash away grime. If stains appear, I apply a mixture of warm water and mild soap, scrubbing with a stiff brush. Sealing the pavers every 2-3 years protects them from moisture and enhances their color. Additionally, I ensure proper drainage to avoid water pooling, which can cause damage over time.
Repairing Damages
Addressing damages promptly keeps the patio safe and attractive. If a paver cracks or shifts, I replace it by removing the damaged piece and fitting a new one securely. For uneven surfaces, I add or remove sand in the joints to level the area. When joints become loose, I refill them with polymeric sand, then compact and mist the surface to stabilize the pavers. In cases of significant settling, I may need to excavate and redo the base layer to ensure the patio remains stable and even.
Conclusion
Creating a paver patio has been a rewarding journey for me and I hope it inspires you too. With the right planning and materials you can design a space that’s perfect for relaxing or entertaining. Whether you choose to tackle the project yourself or hire a pro the satisfaction of stepping onto your own beautiful patio is unmatched. Remember to maintain it regularly to keep it looking great for years to come. I can’t wait to see the amazing outdoor spaces you’ll create!


