Imagine stepping into your own backyard oasis where the soothing sounds of flowing water create a tranquil escape from the hustle and bustle of daily life. Installing a waterfall feature can transform your yard into a serene retreat, adding both beauty and a sense of calm.

I’ve always been fascinated by the natural elegance of waterfalls and bringing one into my own garden was a rewarding experience. Whether you’re a seasoned gardener or a DIY enthusiast, setting up a waterfall feature is more achievable than you might think. Let me guide you through the essentials to help you create your perfect outdoor sanctuary.
Understanding Waterfall Features
Installing a waterfall feature transforms your yard into a serene retreat. It combines aesthetics with functionality, enhancing your outdoor space.
Benefits of Adding a Waterfall to Your Yard
Waterfalls offer several advantages:
- Visual Appeal: Adds movement and depth to your landscape.
- Sound Relaxation: Soothing sounds reduce stress and promote relaxation.
- Wildlife Attraction: Draws birds and beneficial insects to your garden.
- Property Value: Enhances your home’s value with a unique feature.
- Focal Point: Guides the layout and design of your outdoor space.
Types of Waterfall Designs
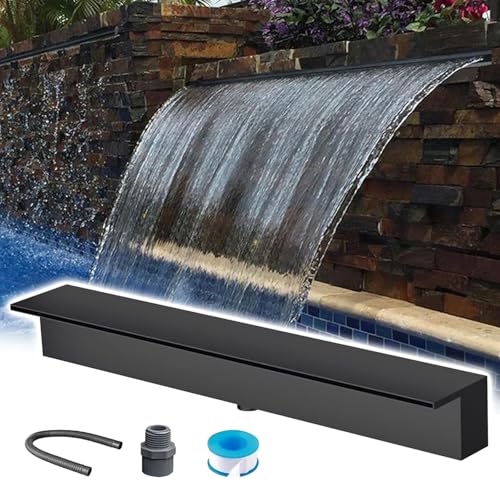
- Sheet Waterfalls: Smooth, continuous flow; ideal for modern landscapes.
- Tiered Waterfalls: Multiple levels; add dimension and interest.
- Rock Waterfalls: Natural rocks; create a rustic, organic look.
- Pondless Waterfalls: Circulate water without a visible pond; save space and reduce maintenance.
- Wall-mounted Waterfalls: Attach to existing structures; perfect for smaller yards or patios.
Planning Your Waterfall Installation
Planning ensures a successful waterfall installation. I’ll focus on essential aspects to prepare your yard effectively.
Assessing Your Yard’s Landscape
Assessing your yard’s landscape involves evaluating the topography, soil type, and existing vegetation. I’ll measure available space to determine the appropriate waterfall size and design. Identifying sunlight exposure helps in selecting suitable plants around the feature. Ensuring proximity to a power source is crucial for pump installation. I’ll analyze drainage patterns to prevent water pooling and manage runoff efficiently.
Setting a Budget
Setting a budget outlines the financial scope of the project. I’ll determine overall costs, including materials, labor, and maintenance. Allocating funds for essential components like the pump, liner, and rocks ensures quality. Considering additional expenses for electrical work and landscaping enhancements keeps the project comprehensive. Researching suppliers helps find quality products within my budget. Planning for ongoing maintenance costs sustains the waterfall’s functionality and appearance.
Essential Materials and Tools
Installing a waterfall feature requires careful selection of materials and the right tools to ensure durability and aesthetic appeal. Here’s what you’ll need to get started.
Choosing the Right Materials
Selecting appropriate materials ensures your waterfall stands the test of time and complements your landscape. Opt for natural stone like slate or limestone for a classic look, or use concrete blocks for a modern design. Waterproof liners, such as EPDM rubber, prevent water leakage and protect underlying structures. Additionally, choose a reliable pump with sufficient horsepower to maintain consistent water flow. For finishing touches, consider decorative pebbles, gravel, and plants that thrive in moist environments to enhance the overall appearance.


Required Tools for Installation
Having the right tools simplifies the installation process and ensures precise construction. Gather essential tools including a shovel for digging the foundation, a level to maintain even surfaces, and a tape measure for accurate measurements. A rubber mallet helps in placing stones without damage, while a drill with masonry bits is necessary for securing stones and fixtures. Additionally, use a utility knife to cut waterproof liners and shears for trimming plants. Safety gear like gloves and goggles should also be on hand to protect during the installation.
Step-by-Step Installation Process
Installing a waterfall feature involves careful planning and precise execution. Here’s how I approach each step to create a stunning backyard oasis.
Preparing the Site
First, I assess the yard’s landscape. I measure the area to determine the waterfall’s dimensions and mark the location. Next, I remove any existing vegetation and debris to ensure a flat, stable base. I dig a hole for the pond or basin, typically 12 inches deep, allowing enough space for the waterproof liner. If the terrain is uneven, I use a level to create a smooth surface, which is crucial for the waterfall’s stability and appearance.
Building the Waterfall Structure
I begin by laying down the waterproof liner, ensuring it fits snugly within the pond area. Then, I arrange the natural stones or concrete blocks to form the waterfall’s shape. Starting from the bottom, I stack the stones securely, leaving gaps for water flow. I use a rubber mallet to adjust the stones for a natural look, maintaining an even surface. For added durability, I reinforce the structure with mesh or additional stone layers, ensuring it can support the water’s weight and movement.
Installing the Pump and Plumbing
Next, I set up the pump near the pond’s edge, connecting it to the tubing that directs water to the top of the waterfall. I hide the plumbing by burying the tubing under the rocks, ensuring a seamless flow. I test the pump to check for consistent water movement and adjust the flow rate as needed. Finally, I secure all connections and ensure there are no leaks, allowing the waterfall to operate smoothly and efficiently.


Maintenance Tips for Your Waterfall
Keeping your waterfall in top shape ensures its beauty and functionality year-round. I follow these maintenance tips to preserve my backyard oasis.
Regular Cleaning and Upkeep
Regular cleaning prevents buildup and keeps water flowing smoothly. I:
- Remove Debris: Clear leaves, twigs, and other debris weekly to avoid clogging the pump.
- Clean the Pump: Every month, I disconnect and clean the pump filter to maintain efficiency.
- Wipe Down Surfaces: I use a soft cloth to wipe stone surfaces, preventing algae growth and moss buildup.
- Check Water Levels: Daily, I ensure the water level stays consistent to avoid pump damage and maintain aesthetics.
- Inspect for Leaks: Weekly inspections help me identify and fix any leaks promptly, preserving the structure.
Seasonal Maintenance
Seasonal care adapts to weather changes, protecting your waterfall year-round. I:
- Spring: After winter, I inspect for frost damage, clean all components, and restart the pump to ensure smooth operation.
- Summer: I monitor water levels closely, adjust the pump speed if needed, and trim surrounding vegetation to allow proper sunlight.
- Fall: I remove fallen leaves and prepare the waterfall for cooler temperatures by draining the pump and covering exposed parts.
- Winter: I shut down the system, drain all water to prevent freezing, and cover the waterfall with a waterproof tarp to protect against snow and ice.
| Season | Maintenance Tasks |
|---|---|
| Spring | Inspect damage, clean components, restart the pump |
| Summer | Monitor water levels, adjust pump speed, trim vegetation |
| Fall | Remove leaves, drain pump, cover exposed parts |
| Winter | Shut down system, drain water, cover with waterproof tarp |
By following these regular and seasonal maintenance steps, my waterfall remains a stunning and tranquil feature in my yard all year long.
Conclusion
Creating a waterfall in my yard has been one of the most rewarding projects I’ve undertaken. Watching the water cascade and hearing its soothing sounds every day brings a sense of peace and joy that’s hard to find elsewhere. It’s amazing how a simple feature can transform your outdoor space into a personal sanctuary. Whether you’re a seasoned gardener or just starting out, installing a waterfall is definitely achievable and adds a unique charm to your home. I’m excited to continue enjoying my backyard oasis and encourage you to take the leap and bring your vision to life. It’s truly worth the effort and the beauty it adds is unparalleled.
« 10 Affordable Hardscaping Ideas to Transform Your Outdoor Space on a Budget Gardening in the Rocky Mountains: Essential Tips for Thriving Mountain Gardens »