So, you’ve decided to tackle that paver project in your backyard, but now you’re wondering how to get that perfect, professional finish. Well, we’ve got you covered! Using a plate compactor on pavers is a game-changer when it comes to achieving a solid, level surface that will stand the test of time.

When it comes to compacting pavers, it’s all about the right technique and equipment. In this article, we’ll walk you through the step-by-step process of using a plate compactor like a pro. From preparing the area to compacting the pavers and finishing touches, we’ll share our expert tips and tricks to help you get the job done efficiently and effectively.
Understanding Plate Compactors
As landscape designers, we know that a plate compactor is a vital tool for achieving a flawless and durable surface when working on any paver project. It ensures that the pavers are compacted evenly, minimizing the risk of future movement or settling. The proper use of a plate compactor is essential to create a professional and long-lasting finish for outdoor spaces.
What Is a Plate Compactor?
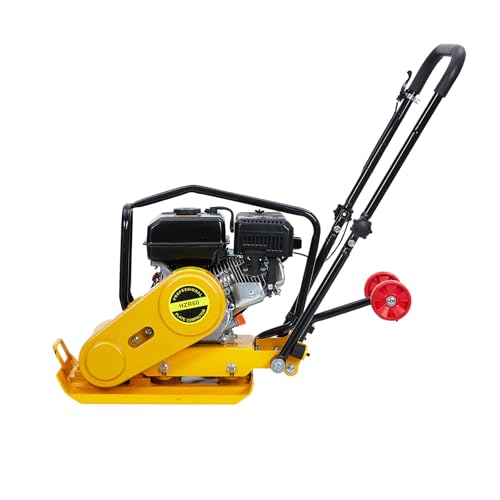
In our line of work, we rely on plate compactors to compress the surface area of the pavers efficiently. A plate compactor, also known as a tamper or wacker plate, is a machine with a large flat plate at the base that exerts pressure on the surface. This pressure helps to remove air gaps and any slight movements between the pavers, resulting in a solid and uniform surface.
Types of Plate Compactors
When selecting a plate compactor for a project, we consider several factors, including the size of the area, the type of soil, and the thickness of the pavers. There are two main types of plate compactors that we often use:
- Forward Plate Compactors: These compactors are ideal for smaller projects or areas with limited space. They are easy to maneuver and operate in forward motion, making them suitable for compacting in tight corners or along edges.
- Reversible Plate Compactors: Reversible plate compactors provide added versatility as they can move in both forward and reverse directions. This feature is beneficial when working on larger areas or when compacting challenging soil types.
Each type of plate compactor has its own advantages, and choosing the right one depends on the specifics of the project at hand. By understanding the different types available, we can select the most suitable plate compactor to achieve optimal results in our landscaping projects.
Preparing to Use a Plate Compactor on Pavers
Safety First: Gear and Precautions
Before we start compacting our pavers, safety is our top priority. To ensure a safe working environment, we need to gear up properly. Here’s what we need:
- Safety Gear: It’s crucial to wear the right gear, including safety glasses to protect our eyes from debris, ear protection to minimize noise exposure, work gloves for a better grip, and sturdy boots for foot protection.
- Clothing: Comfortable, close-fitting clothing is essential to avoid any entanglement with the plate compactor.
- Precautions: Remember to remove any obstacles, debris, or loose materials from the work area. Ensuring a clear path minimizes the risk of tripping or the compactor getting stuck.
- Inspect the Area: Check the pavers for any damage or loose stones that could cause issues during compaction. Repair or replace damaged pavers before starting the compaction process.
Setting Up Your Work Area
Now that we are geared up and the area is clear, it’s time to set up our work area for efficient compacting:
- Clear the Surface: Sweep the surface of the pavers to remove any dirt, sand, or debris. A clean surface ensures proper compaction, leading to a smooth finish.
- Adjust the Plate Compactor: Set the plate compactor at the starting point of your project. Ensure the compactor is on stable ground and adjust the travel speed and vibration settings according to the manufacturer’s instructions.
- Positioning: Stand behind the plate compactor with a firm grip on the handles. Keep your feet a safe distance away from the machine to prevent any accidental contact.
- Start Slowly: Begin compacting the pavers slowly, moving in a forward-backward motion to ensure even compaction across the surface. Avoid excessive speed to maintain control over the compactor.
By following these steps, we can prepare ourselves and the work area effectively before using the plate compactor on our pavers, ensuring a safe and successful compaction process.


The Step-by-Step Process
Laying the Pavers
When it comes to laying pavers, our first step is to ensure that the base is properly prepared. We excavate the area to the required depth, usually around 6 inches, to allow for the base materials and pavers. We then fill the area with the necessary base materials, such as crushed gravel or stone dust, and compact it using hand tamping to create a sturdy foundation for the pavers.
The Importance of Sand and Base Materials
Sand and base materials play a crucial role in the stability and durability of the paver installation. After laying the base materials, we spread a layer of sand over the compacted base to provide a level surface for the pavers. The sand acts as a cushion and helps to fill the gaps between the pavers, allowing for proper interlocking. It’s essential to use the right type and amount of sand to ensure a smooth and even surface.
Starting the Compaction Process
Before starting the compaction process, we make sure to clear the work area of any debris or obstacles that could interfere with the plate compactor. We adjust the compactor settings according to the manufacturer’s guidelines and start compacting the pavers in a systematic pattern, ensuring even coverage across the entire surface. Proper compaction not only sets the pavers firmly in place but also helps prevent future settling and shifting, ensuring a long-lasting and visually appealing finish to the project.
Key Techniques for Effective Compaction
Operating the Plate Compactor
When we are operating the plate compactor, it’s crucial to maintain a steady and controlled movement. We position the compactor at the edge of the pavers and start it with a gentle push. By moving the machine in a forward and backward motion, we ensure even compaction across the entire surface. It’s essential to avoid rapid movements that may lead to uneven compaction and potential damage to the pavers.
Handling Corners and Edges
In handling corners and edges, we need to pay special attention to ensure proper compaction in these challenging areas. We use a smaller compactor or a hand tamper to reach corners and edges that the larger machine cannot access easily. By taking our time and applying consistent pressure, we achieve uniform compaction along the perimeter of the pavers, preventing potential shifting or uneven surfaces.


Troubleshooting Common Issues
When compacting pavers, we may encounter common issues that can affect the final outcome of the project. One such issue is the formation of ruts or uneven surfaces due to excessive compaction in certain areas. To address this, we adjust the speed of the compactor and vary the direction of compaction to ensure uniform pressure distribution. Additionally, if we notice pavers are not settling correctly, we sprinkle a small amount of sand over the surface and re-compact to promote better interlock and stability.
By mastering these key techniques for effective compaction, we ensure a professionally executed project that stands the test of time and enhances the beauty of the outdoor space.
After Compaction: Finishing Touches
Checking for Level and Stability
Once we’ve completed the compaction process, it’s essential to ensure that the pavers are level and stable. We recommend using a straight edge or level to check for any high or low spots across the paved area. By doing this, we can identify any areas that may need adjustments to achieve a uniform surface.
Cleaning and Maintenance
After achieving a perfectly compacted and leveled surface, our attention shifts to cleaning and maintaining the pavers. We suggest using a broom to sweep sand or fine gravel over the pavers’ joints to fill any gaps and enhance stability. This not only improves the aesthetics but also prevents weed growth between the pavers.
Regular maintenance is key to preserving the longevity of the paved area. We advise periodically inspecting the pavers for any signs of damage, such as cracks or shifting. If any issues are found, addressing them promptly can prevent further damage and ensure the durability of the paver installation. Additionally, periodic resealing of the pavers can help protect them from stains and enhance their overall appearance.
« Unveiling the Ultimate Guide: Can Pavers Withstand Rainy Weather? Find Out Now Discover the Jaw-Dropping Paving Facts That Will Transform Your Outdoor Space »
Maximizing the Lifespan of Your Pavers
As landscape designers, we understand the importance of regular maintenance in extending the lifespan of your pavers. Proper care ensures that your outdoor space remains beautiful and functional for years to come. Here are some effective tips to help you maintain the integrity of your pavers.
Regular Maintenance Tips
To keep your pavers looking pristine, it’s essential to incorporate regular maintenance into your routine. Here are some simple yet effective tips to ensure the longevity of your paved area:
- Inspect for Damage: Regularly inspect your pavers for any signs of damage such as cracks, chips, or uneven surfaces. Addressing these issues promptly can prevent further damage and maintain the overall appearance of your outdoor space.
- Sweep and Clean: Keep your pavers clean by regularly sweeping away debris such as leaves, dirt, and dust. For a deeper clean, consider pressure washing your pavers to remove tough stains and embedded dirt.
- Reseal Periodically: To protect your pavers from harsh weather conditions and wear, consider resealing them every few years. Resealing helps maintain the color and structural integrity of the pavers, keeping them looking new for longer.
- Reapply Jointing Sand: Over time, the jointing sand between your pavers may wear away. Reapply jointing sand as needed to stabilize the pavers, prevent weed growth, and maintain a uniform appearance.
When to Recoat or Re-sand
Knowing when to recoat or re-sand your pavers is crucial in preserving their longevity. Here are some indicators that it’s time to recoat or re-sand your pavers:
- Loss of Jointing Sand: If you notice that the jointing sand between your pavers has significantly worn away or been washed out, it’s time to reapply jointing sand. This helps stabilize the pavers and prevents shifting.
- Faded or Worn Sealant: When the sealant on your pavers starts to fade or wear off, it’s a sign that they need to be resealed. Recoating your pavers will enhance their appearance, protect them from damage, and prolong their lifespan.
By following these maintenance tips and knowing when to recoat or re-sand your pavers, you can ensure that your outdoor space remains a welcoming and durable extension of your home. Regular care and upkeep will not only enhance the visual appeal of your pavers but also protect your investment in your landscape for years to come.
Conclusion
Using a plate compactor on pavers is essential for achieving a durable and visually appealing outdoor space. By following proper techniques and safety precautions, we can ensure effective compaction and long-term stability for our backyard projects. Remember to pay attention to details like maintaining steady movement, addressing corners and edges, and troubleshooting any issues that may arise during the compaction process. Additionally, don’t forget the finishing touches such as checking for level and stability, sweeping sand over joints, and conducting regular maintenance to preserve the longevity of the paved area. By incorporating these practices into our paver projects, we can enjoy a beautiful and well-maintained outdoor space for years to come.