Transforming your outdoor space is easier than you might think. I’ve discovered that stone veneer offers a stunning way to enhance hardscape features without breaking the bank or requiring extensive labor. Whether you’re dreaming of a beautiful patio, a charming walkway, or a striking retaining wall stone veneer can bring your vision to life.

What I love about stone veneer is its versatility. It mimics the look of natural stone but is lighter and more manageable. This means you can achieve a high-end appearance with fewer hassles. Plus stone veneer comes in a variety of colors and textures so you can customize your hardscape to perfectly match your style and your home’s exterior.
In this article I’ll share tips and insights on choosing and installing stone veneer for your hardscape projects. Let’s dive in and explore how you can create an inviting and enduring outdoor space using this beautiful material.
What Is Stone Veneer?
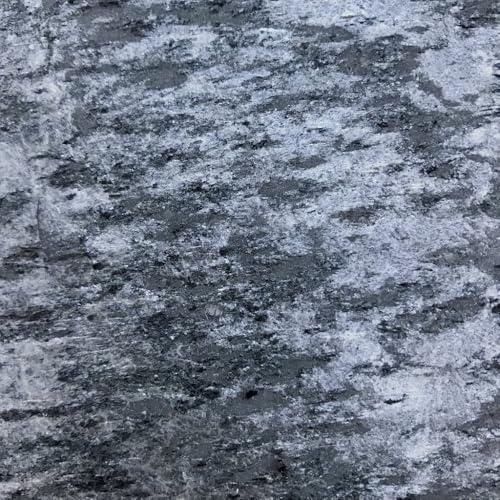
Stone veneer is a thin layer of natural or manufactured stone applied to surfaces like walls, fireplaces, and outdoor features. I use it to achieve the look of full stone without the heavy weight and high cost. Natural stone veneer consists of real stone pieces, offering unique textures and colors. Manufactured stone veneer is crafted from concrete and other materials, providing consistency and ease of installation. Both types come in various styles, such as stacked, tumbled, or textured, allowing customization for different hardscape projects. Stone veneer enhances aesthetics while maintaining durability, making it a popular choice for homeowners looking to elevate their outdoor spaces.
Benefits Of Using Stone Veneer For Hardscape
Stone veneer provides multiple advantages for hardscape features, enhancing both durability and visual appeal.
Durability And Longevity
Stone veneer resists weathering and erosion, ensuring structures last decades. Its composition minimizes cracking and fading, maintaining integrity in various climates.
Aesthetic Appeal
Stone veneer offers diverse textures and colors, matching numerous design styles. It mimics natural stone, creating a high-end look with versatile customization options.
Applications In Hardscape Features
I use stone veneer to enhance various hardscape features, combining functionality with visual appeal. Below are key applications for stone veneer in outdoor spaces.
Patios And Walkways
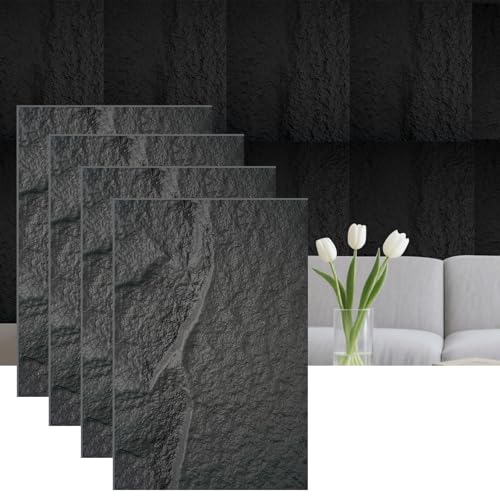
Stone veneer provides durable surfaces for patios and walkways. It resists heavy foot traffic and weather conditions, ensuring longevity. Available styles include stacked, random, and brick patterns, offering versatile design options. Installation involves applying mortar to a prepared base, securing the veneer pieces, and sealing them for protection.


Retaining Walls
Stone veneer strengthens retaining walls while adding aesthetic value. It effectively manages soil erosion and maintains landscape structure. Veneer types vary in height and thickness, accommodating different project requirements. Building a retaining wall with stone veneer requires a stable foundation, proper layering of the stones, and integration of drainage systems to ensure stability.
Installation Process
Installing stone veneer enhances the beauty and durability of your hardscape features. I follow a systematic approach to ensure a professional and long-lasting finish.
Tools And Materials Needed
Tools:
- Tape measure
- Level
- Hammer
- Chisel
- Trowel
- Mortar mixer
- Safety goggles
- Gloves
Materials:
- Stone veneer panels
- Mortar or thin-set adhesive
- Metal lath or waterproof membrane
- Masonry screws or nails
- Caulk for sealing
- Gravel and sand for the foundation
Step-By-Step Guide
- Prepare the Surface
- Clean and level the existing surface. I ensure it’s free from debris and make any necessary repairs to provide a stable base.
- Install the Base Layer
- Apply a waterproof membrane or metal lath to the surface. This step helps with adhesion and prevents moisture damage.
- Mix the Mortar
- Combine mortar or thin-set adhesive following the manufacturer’s instructions. I achieve a smooth, workable consistency for easy application.
- Apply the Mortar
- Spread a layer of mortar on the surface using a trowel. I cover small sections at a time to maintain the adhesive’s effectiveness.
- Place the Stone Veneer
- Position the stone veneer panels onto the mortar. I press each piece firmly, ensuring proper alignment and snug fitting.
- Secure the Veneer
- Fasten the stone panels with masonry screws or nails. I space them evenly to provide stability without compromising the aesthetic.
- Fill the Gaps
- Use caulk to seal any gaps between the stones and edges. This step prevents water infiltration and enhances the overall appearance.
- Clean and Finish
- Remove excess mortar and clean the stone surfaces. I inspect the installation, making any adjustments to ensure a flawless finish.
By following these steps, I achieve a durable and attractive stone veneer installation that elevates any hardscape feature.
Maintenance And Care
Maintaining stone veneer ensures its longevity and keeps your hardscape features looking pristine. Regular upkeep prevents minor issues from escalating and preserves the aesthetic appeal.
Cleaning
I clean stone veneer surfaces using a garden hose to remove loose debris after each season. For deeper cleaning, I mix mild soap with water and gently scrub with a soft brush, avoiding harsh chemicals that can damage the stone.


Sealing
Sealing stone veneer every two to three years protects it from moisture and stains. I apply a high-quality masonry sealer, following the manufacturer’s instructions, to maintain the stone’s natural color and enhance its durability.
Inspecting for Damage
Periodically, I inspect stone veneer for cracks, chips, or loose pieces. Early detection allows me to address problems promptly, preventing further deterioration and ensuring the structural integrity of the hardscape feature.
Replacing Damaged Pieces
When I find damaged stones, I remove and replace them promptly. I match the replacement stone to the existing veneer for a seamless appearance, using appropriate mortar to secure the new piece firmly.
Preventive Measures
To minimize wear and tear, I ensure proper drainage around stone veneer installations. I also trim nearby vegetation to prevent roots from pushing against the stone, reducing the risk of damage over time.
Tools and Materials
| Task | Recommended Tools | Materials Needed |
|---|---|---|
| Cleaning | Garden hose, soft brush | Mild soap, water |
| Sealing | Paintbrush or sprayer | Masonry sealer |
| Inspecting | Flashlight, magnifying glass | Inspection checklist |
| Replacing Pieces | Hammer, chisel, trowel | Replacement stone, mortar |
| Preventive Measures | Shovel, drainage materials | Gravel, drainage pipes |
Regular maintenance keeps stone veneer hardscape features attractive and functional, ensuring they remain a valuable part of your outdoor space for years to come.
« River Rock for Landscape Accents: Elegant Solutions to Enhance Your Garden Crushed Stone for Drainage Solutions: Benefits, Types & Installation Guide »
Conclusion
Choosing stone veneer has been a game changer for my outdoor spaces. It’s incredible how affordable and versatile this material is, allowing me to create beautiful patios walkways and retaining walls without breaking the bank. The variety of textures and colors means I can match any design style I envision.
I appreciate how durable stone veneer is, standing up to weather changes and heavy use while keeping its charm intact. The ease of installation made the process enjoyable rather than stressful, and the maintenance has been straightforward too. Seeing my outdoor areas transform with minimal effort has been so rewarding.
If you’re looking to enhance your hardscape features stone veneer offers the perfect blend of aesthetics and functionality. I’m excited to continue exploring new projects and sharing the results with you all.